
Behind The Scenes of an Eichler Renovation
DIY Bathroom Remodel: Step-by-step
Why DIY? Duh–It’s more fun! And Bathroom Remodels Are So Darn Expensive
Overwhelmed by the quotes coming in? Bathroom remodels are one of the most requested projects we receive at our design firm, and when it goes out to bid, it’s not uncommon to find jaw-dropping rates, lengthy timelines, and plenty of contractors that won’t even call you back. Bathroom renovations require a ton of work involving many steps and trades, so I was eager to share the experience with our own DIY Eichler bathroom project.
Bathroom Remodels For Less Than $10K
You could? do a bathroom remodel for as little as $5-10K, but let’s understand a few major differences between a “designer bathroom” versus a “contractor special”. You may see ads online or flyers advertising pretty sweet deals, but they will be using low-cost materials (and there’s absolutely nothing wrong with this). I’ve done plenty of remodels where I’ve run to The Home Depot to grab a vanity, accessories, a toilet, tile, and a prefab shower pan and it has done the job.
What Goes Into a Designer Bathroom?
The key differences in a $50-100K bathroom is the holistic design time and specific materials chosen. Designers spend hours getting the space measured and modeled, while coming up with a style that suits your taste and fits your needs. The materials to get just the right look will often not be available at the big box stores, and quite frankly, many people want something they don’t see everyday. The final X-factor is the labor, which ranges depending on skill level. A handyman may be able to do all of it or a General Contractor may have a crew with specialities such as design, tiling, carpentry, electrical, plumbing, drywall, masonry, and paint. A design concept can run $2-6K; items such as a vanity can run $3-5K alone, and we haven’t even picked out a sink, faucet, toilet or tile. Artisanal tile can run $35-65/sq.ft; fixtures are often in the thousands after you account for shower, sink, tub, and towel hardware. The list goes on and adds up quickly.
Bathrooms are also small spaces and require different (and specialty) trades, so a General Contractor may also want a larger project like a whole house remodel instead of tying up their crew just a few weeks at a time for a smaller project. This is why it’s often difficult to wrangle a GC to even give you a quote, which takes time they may not even charge you for.
In our case, it was our own space, so we took our time to DIY and spent our investment in materials, knowing we’d be contributing to the labor.
Steps to Remodel a Bathroom
Here’s the rough schedule of a bathroom remodel (which may be different for everyone):
Design
Order materials
Demo
Floor tiling
Rough plumbing & electrical
Shower pan
Mirror
Paint
Tiling
Toilet
Vanity
Finish plumbing & electrical
Shower doors
Closet
Design of The Eichler Bathroom Remodel
Shooting from the hip dinner chatter led to a rough pencil sketch with measurements and rough calculations on how much tile was needed. From here we ended up changing up the location of the cabinets, but everything else remained close. When Karen designs for Clients, it’s way more detailed and tech-savvy (think SketchUp 3D models), but when it’s for our own house, we just cut to the chase.


Ordering Materials for The Eichler Bathroom Remodel
It was key to get the tile, fixtures, vanity, and mirror ordered after the design was agreed upon. Materials can take months, even more so during a Pandemic. In fact, our faucet and sink took 6 - 9 months… long enough to even order an interim sink and faucet just to get us back a couple months of usage.
Demolition Phase

The bathroom to be demo’d.


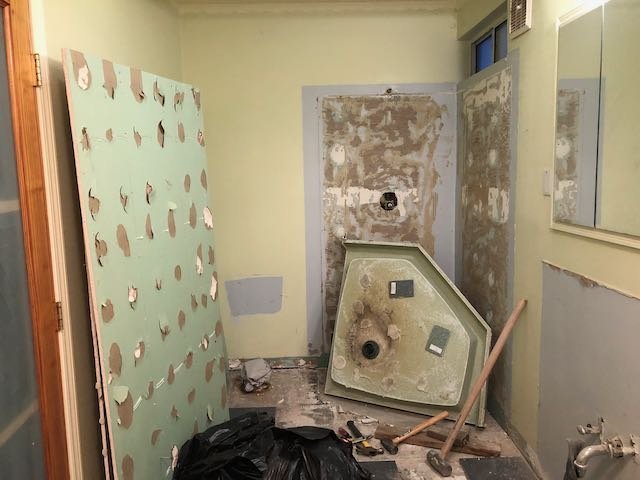

Demo’ing the space is a huge first step because it frees up the mind, visually, and makes you start committing to the project. The tub surround tile was first to go, in order to get to the screws holding in the tub, which was Sawzalled in half to get it out. The faux glassblock Home Depot contractor special window had been removed years ago, but I thought to include it for full effect.
The frameless glass shower enclosure and base was carefully removed and donated to someone eager to redo another bathroom, along with the base and toilet. The cultured marble wall panels were easily hammered down. A little Facebook Marketplace action took place to upcycle these materials.
Physically, the toughest part was sledgehammering up the floor tile. We recruited our teenage son to try his hand at some of the demo. We also tried a pneumatic chisel… like one of the huge ones with a decent size compressor, yet it failed to make much of a dent. Brute force won this round!
Floor Prep & Tiling
The previous Jacuzzi had a drain area which needed to be filled. There were also plumbing lines and a vent to be capped.
Using some of the leftover materials donated from a previous project (thank you Matt & Lauren) we set all the tile available and needed to order more. We used a charcoal slate-look 12x24 ceramic tile and Versabond mortar.


Steps for a DIY Shower Pan
The shower pan is a project in itself, and after weighing our options with all the modern Kerdi and Wedi products, I opted for a liquid membrane combined with the traditional mortar pan and cement board walls so that we could customize the size of the area because many of the alternative kits were geared towards a conventional dimension.
Here are the general steps for the traditional mortar curbed shower pan:
Build the curb using Redwood 2x4s and masonry anchor screws
Fit and install the drain
Use deck mud to build up the pre-slope layer
Install the shower liner
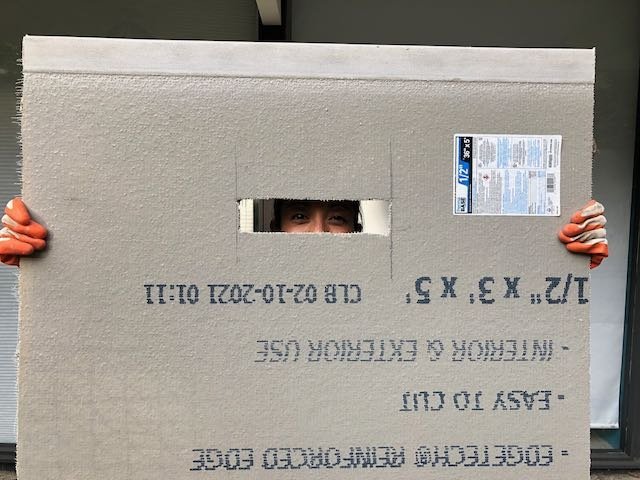
Install cement board around the base walls and curb
Lay the top mortar layer
Now you’re ready to waterproof and tile!

Curb installation
Additional blocking was added along with our low-profile curb.


For the traditional mortar shower pan, thinset mortar was added on the concrete floor before the deck mud was added to create a better bond. A thin layer of gravel was added around the drain to prevent clogging from thinset of the weep holes around the base of the drain.

After cement board backer and shower liner installed.

Dried mortar bed with curb wrapped in cement board.
The backer board was added around the base of the shower walls and inside the curb after the liner was installed.
I didn’t have photos of the shower pan liner installation, but this was a bit of a process. A huge thanks goes out to friends coming out to get their hands dirty, @midcenturymaurer @gdwarren making the job was a breeze, mainly because I sat back with a Lacroix and inhaled the lovely fumes from the liner adhesive ;)


Cement board was added around the rest of the curb, and the rest of the floor tile arrived, so we continued with the floor tile installation.

Rough valve installation.

Cement board installed and seams taped and mudded.
The rough shower valve was installed, a niche was framed out, then the cement board went up with fiberglass seam tape and mortar. The walls need to be as plumb and flat as possible when installing. The show pan liner does add thickness to the base of the wall, so shims were needed before the rest of the wallboard was added to keep it plumb and smooth. If the walls aren’t perfect, the glass shower doors will have gaps. There was also blocking added to prevent any bowing of boards, and to allow mounting points for the glass anchors.
Karen thoroughly enjoying the cement board work
Waterproofing a Shower
Kerdi vs Wedi vs Redgard
There are many great products on the market that include Kerdi and Wedi board, and various liquid membrane solutions. They both have their own approaches, and while I’ve used both, I chose the old fashioned method to save a little bit on cost.
Wedi goes up the quickest, as the board is super easy to worth with, and after the board is up, all you need to do is spread the joint sealant and you’re done. It can take a little as a day, but the performance is hit or miss if your joints aren’t perfectly sealed. You’re basically relying on caulk to waterproof all the seams for your entire shower.
Kerdi is probably the most reliable, as it uses sheet membrane for surfaces, joints, and curbs, but it’ll take a bit more time and labor to mud up the membrane. The materials are going to be a bit more expensive and add a day to allow the seams to dry. It also requires thinset to apply all the seam membrane, so there’s a bit extra labor involved versus the Wedi solution, which only requires tubes of caulk.
How Many Coats of Redgard Do I Need?
Redgard is a liquid membrane that goes over a conventional cement board backer, so it will take the longest, as it’ll require drying times between coats and you’ll learn that the overall thickness required can take several coats to achieve.
Here’s a great video that shows an experiment of how many coats of brushing is required vs troweling coats. I was amazed that it could take 7-8 brush coats or 2 trowel coats to get the thickness to spec. And, I was surprised at how little views this got, so I can only imagine that many people are doing this incorrectly.


Freshly applied topical Redgard membrane waterproofing.

The dried look.

Tiled shower pan.
Key Tips for a Shower Pan & Waterproofing
Get the slope right when forming the mortar layers–1/4” per foot, and in the United States, building codes typically require tile shower curb height to be a minimum of two inches above the top of the drain
Cement board around the pan surround should not sit in the base mortar layer, but in the mortar layer above the pan liner. And, it shouldn’t sit in the pan, but about a 1/4” above, so that it doesn’t wick moisture if water penetrates and floods the base layer.
Understand that evaporation needs to take place, so don’t apply different types of water proofing material over each other (eg - Redgard over Kerdi board). If you do that, there will be ‘sweating’ where water will build up between waterproofing layers and will cause mold and materials to breakdown. We used a pan liner, and applied Redgard on the mortar layer on top of the liner, but in case water leaked through the Redgard, the liner will catch it and run towards the drain and need to evaporate, so we left an area around the drain for it to either go down or evaporate.
Cement board isn’t water proofing protection. It can withstand a lot of water, but will breakdown if it’s constantly getting soaked.
Redgard needs to be applied layer by layer until it reaches the recommended thickness. Painting or rolling it on is often performed, but if you keep researching you’ll realize that the thickness required to meet manufacturer spec will require troweling thick layers.
Bathroom Mirror Installation

The old recessed mirror was removed and a floating lighted mirror went in. Electrical needed to be wired up, and blocking and Sheetrock installed to fill in the old recessed area.

Mirror frame installation

Final mirror installation completed
Vanity Dry Fitting & Drain Adjustment
The vanity was moved into place to see where the drain would land, and we realized the drain needed to move over 8-10”, so we opened up the wall to perform a small job.

Drain adjustment
Eichler Shower Tiling
First we started on the vanity wall mosaic tiling that spanned all the way from the shower over past the mirror.

Tiling The Hex Feature Wall
Our feature wall was first planned out on our patio, where we taped out the wall area onto the ground and laid out our Heath hex tile. This process took a couple weeks, as we casually would step out during work breaks to move tiles around and experiment with designs. We must have iterated a dozen times.


Then each course of tile was transferred to the wall as we tiled. This was the most challenging tiling project we’ve ever experienced for a couple reasons:
We used Heath “seconds” - so these are handmade tiles that came from various batches, which produced various sizes and thicknesses
Hex tiles are just more difficult than right-angle tiles–they require a lot more time when they are individuals and not sheeted. (We’re talking a pace of 2-3 courses a night.)


Completed feature wall.
Toilet Installation
We went with the Crosswater MPRO toilet to replace the Kohler pressure assist, which went in smoothly.

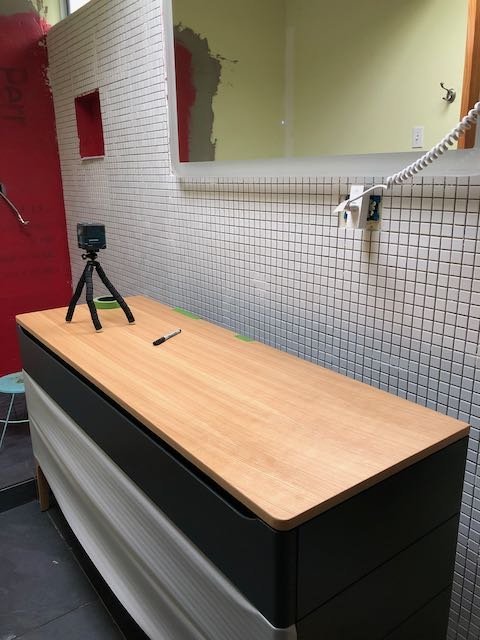
Eichler Bathroom Vanity Installation
We selected a Ronbow vanity, which we loved because of the unique finish and functionality. There are 3 pull-out drawers, appliance receptacles, and a beautiful white oak top which we matched later on with our custom wardrobe closet.
The Duravit sink took awhile to arrive, so we tried ordering a temporary, but it was slightly too large and the vanity cutout would’ve been a tad off, so we opted to just wait for the real thing. After it finally arrive we were excited to continue on with the project!


After cutting out the sink hole, we test fitted the sink and realized the drawer was touching, so we needed to modify the drawer.
Using the old toothpaste trick to transfer marking from the sink to the vanity, we knew what areas of the drawer needed to be cut.

Trim area in vanity drawer
Using a multitool, we cut out the section of the vanity drawer to give the sink the clearance it needed. This is where a solid wood vanity helped out, otherwise we’d be looking at hacked up MDF.

Our faucet hadn’t yet arrived, so we installed a temporary and completed the finish plumbing to get a working sink in place.
Eichler Shower Doors
I debated DIY'-ing the frameless glass shower door and panel, as there are some companies that will ship it directly, but opted for a professional job from Iron Horse Glass. Justin did a fantastic job and the budget spent on professional was well worth the two things we outsourced.


Eichler Bathroom Lighting
Our new globes went in where the previously installed lights were. There were two locations that weren’t ideal, but moving the junction boxes was out of the question given the foam roof. It’s not impossible by any stretch, but more labor than I was willing to take on.


After the tile was completed, I took great care applying the impregnator, ensuring that women and children were clear of the room 😜

Eichler Bathroom Closet
Where the Jacuzzi was installed was where the original Eichler closet was, so we wanted to put it back. Instead of framing out a walk-in closet from the original design, we opted for an open concept.
We searched around for various options from IKEA and other cabinet companies, but ended up designing Karen’s (dream) custom wardrobe, working with Jeremiah Collection, a local cabinet maker in San Leandro.
Our contractor friend, Daniel Awand teamed up with Jeremiah Collection to bring Karen’s sketch to life.

Jeremiah and Daniel installing the custom wardrobe cabinet.
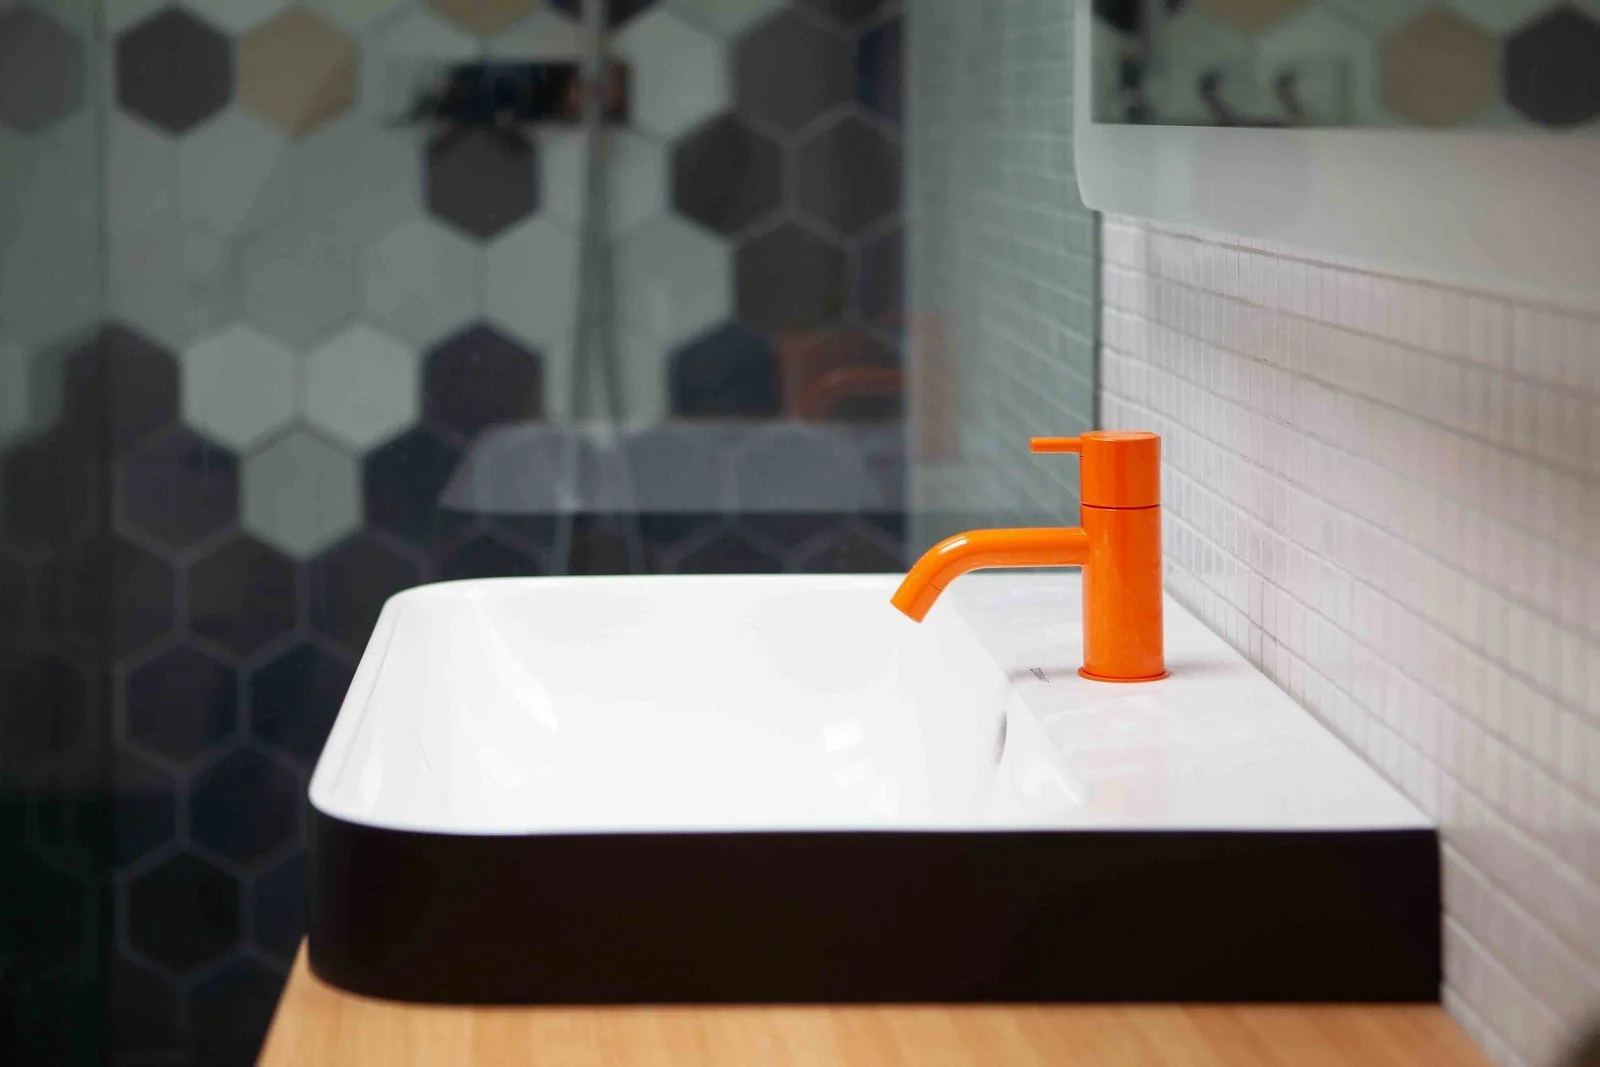
The Completed Bathroom
Our [almost] completed bathroom (in need of a little trim work) has been very usable and absolutely a huge improvement over the old one.
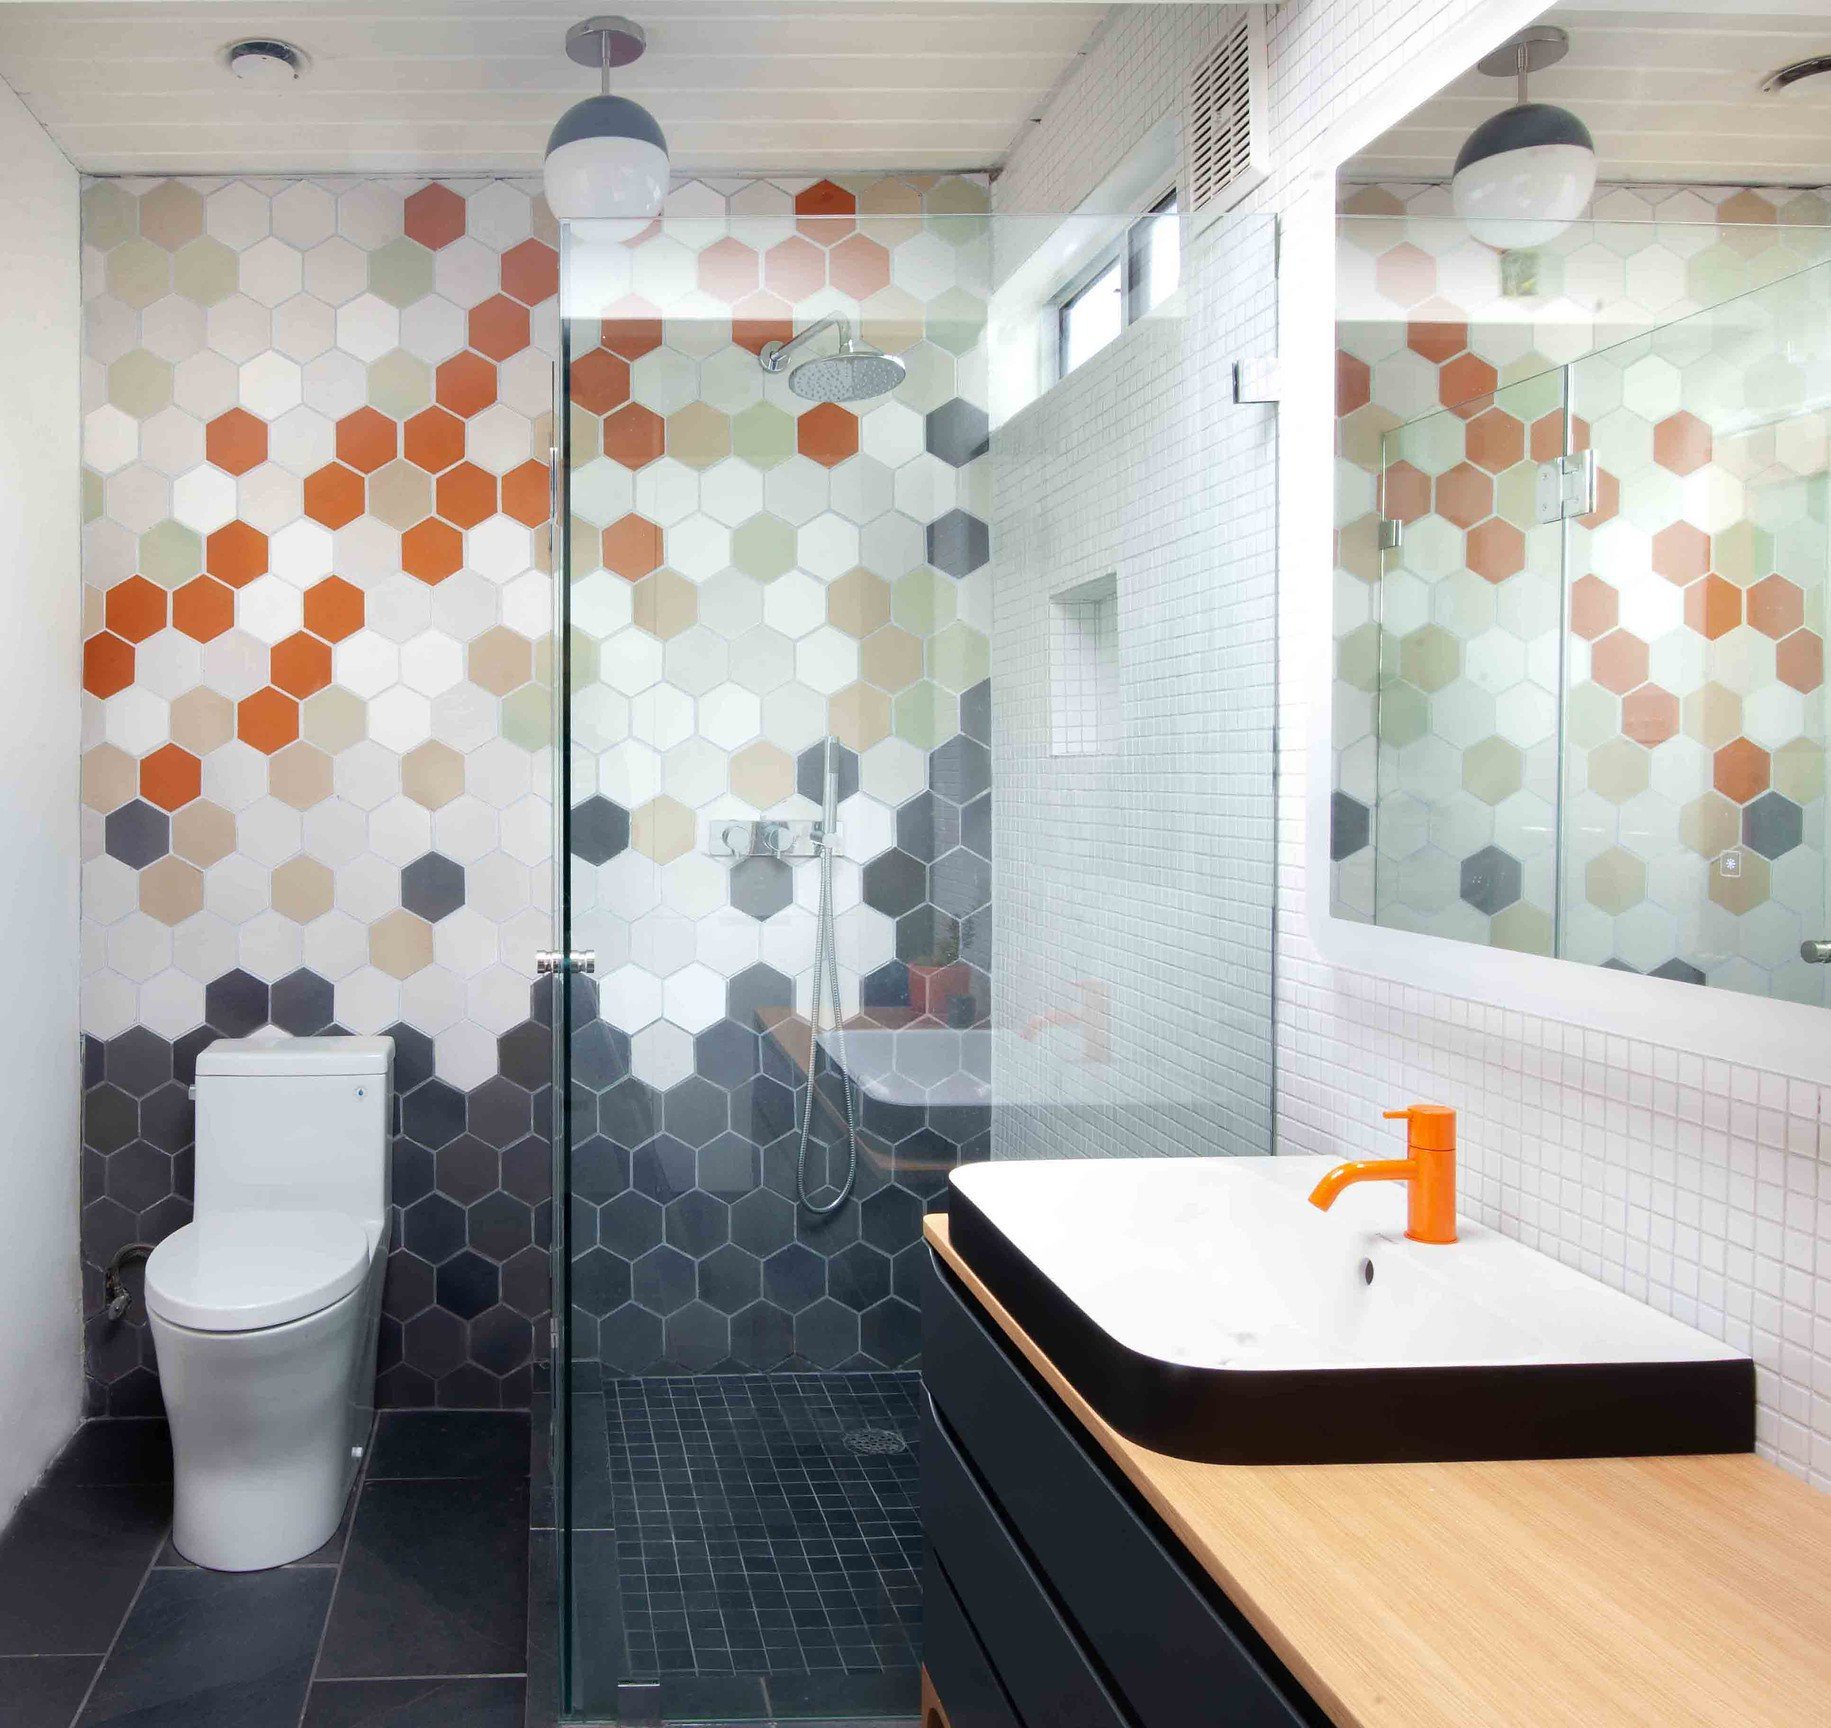


The lower left cabinet houses a pull-out laundry system, which is Karen’s favorite part of the wardrobe design. She also likes that it’s her own closet and I don’t put my stuff in it.
Materials Used in Our Eichler Bathroom Renovation
Sink: Duravit
Faucet: Vola
Vanity: Ronbow
Shower fixtures: Crosswater London MPRO 1701 Thermostatic Valve Rough and Trim Set with Volume Control/Diverter and Integrated Handshower
Custom Wardrobe: Design by Destination Eichler, brought to life by Awand Build Design and Jeremiah Collection
Toilet: Crosswater London
Glass: Iron Horse Glass
Tile: Heath Ceramics
Mirror: Electric Mirror
Light Fixtures: Dutton Brown