
How to Make Floating Concrete Steps

DIY Concrete Steps
Concrete steps are commonly used to create a walkway to a home, but floating concrete steps added a little extra feature while we were committing to pouring all this concrete.
Options for Front Walkway and Steps
You can create steps using a variety of materials:
Brick or Pavers - easier to DIY
Precast concrete - moderate to DIY, but heavy lifting
Pour in place concrete - lower DIY cost, but more labor
Pour In Place Concrete Walkways
We chose the more difficult DIY path and enjoyed learning a few things along the way as a first-time project. It turned out no where near the quality of a pro-grade job, but certainly suited the budget. We had previous experience casting our concrete countertops so this project was definitely easier, but still involved a lot of sweat and patience.
Steps to Pour a Concrete Walkway
Excavate the ground for the walkway
Build the wooden frames for each step
Pour the concrete

Excavating the Ground for Concrete Steps
2x4 planks were laid out to help calculate how many steps and what size to make them. I measured a total rise of 18" from the sidewalk to the landing, and figured that each step would be about six inches. This left me with an option of three steps to get to the sidewalk level, where I would need to put two small pads even with the sidewalk.
Forms for Concrete Steps

Each step was 3.5" thick (standard 2x4 plank), so the first two steps could be simply formed using 2x4s. The three steps up would require 1x6 or 2x6 lumber, because the floating effect required a 2x4 to fill in under the step. Stakes were hammered in to keep the forms in place.
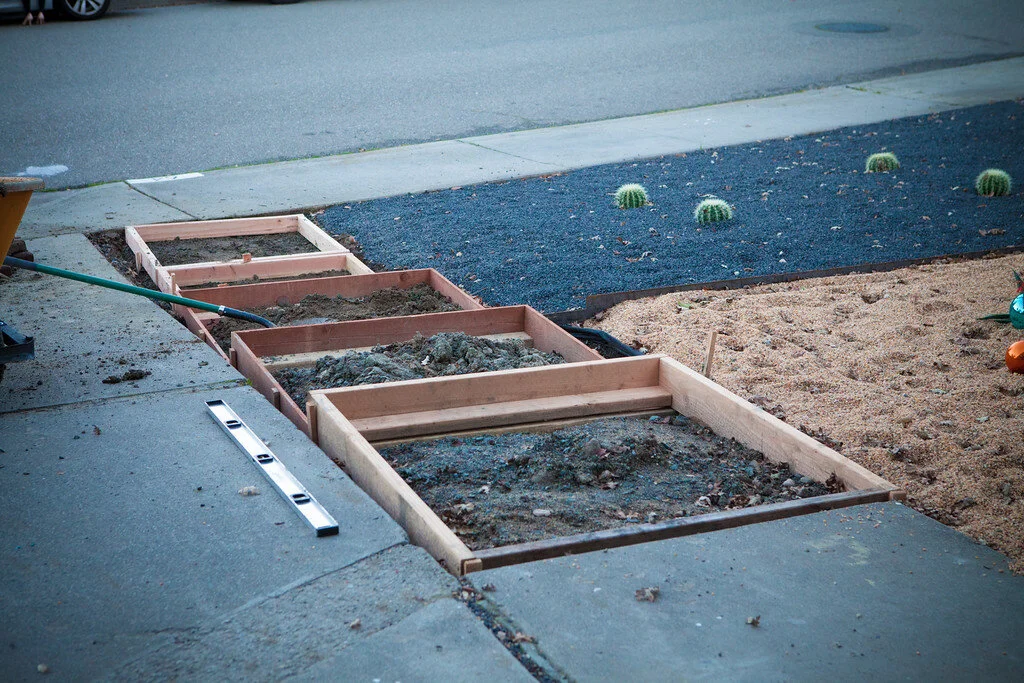
The floating effect is created by adding a 2x4 laid flat along the bottom-front of the form, so that it overlaps the step form below it.

Compacted gravel and mesh was added (which is optional) for the steps. Using the mesh has been debated where one school of thought is that is holds it together to prevent cracking, while the other school believes that a 3-4" thick slab is now weakened by rebar, now leaving less than 1.5" of concrete above and below the rebar.

Cutting mesh at night with an angle grinder.

Freshly poured step after troweling.
When making the floating steps, the you need to pour from the bottom up because the forms overlap each other, so the forms above need to be removed. We did one step a day - removed the form before pouring the one above.
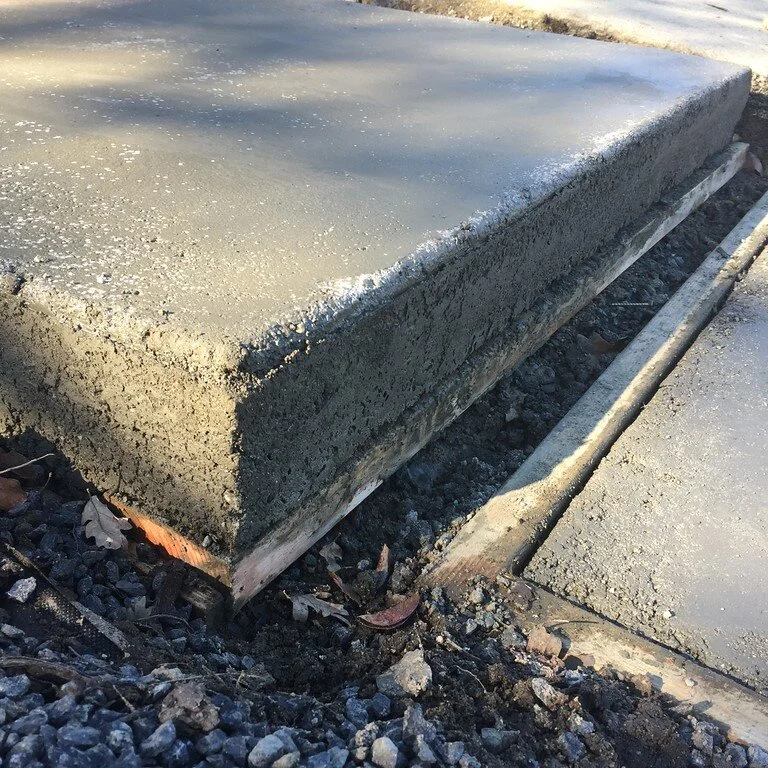
The form freshly removed the following day. Notice the knockout provided by the 2x4 to create the floating effect, which was also removed.
Finished Concrete Steps
Our troweling job wasn't the best, so a slurry mix was applied to smooth out some rough spots using a sponge.

What We Learned From DIY Concrete Steps
Each step was almost 4'x4' which took about 6-9 bags (60lb bags) per step. (Many trips to Lowes!)
1x6 fencing wood seemed more ideal than 2x6 lumber - it's cheaper and easier to remove the forms which became scrap wood.
The form assembly was done using wood screws, but the catch was putting in the screws in locations the could be accessible after a pour, to make removal easy. We chipped a few corners of hacking away with a SawZall at hard to reach screws.
We did this our our California winter break, so temps were 40-50, which slowed drying times. You could pour and trowel, then come back the next morning to apply the finish troweling/floating work.